TUTORIAL
Today's tutorial is made by Vicki Roberston
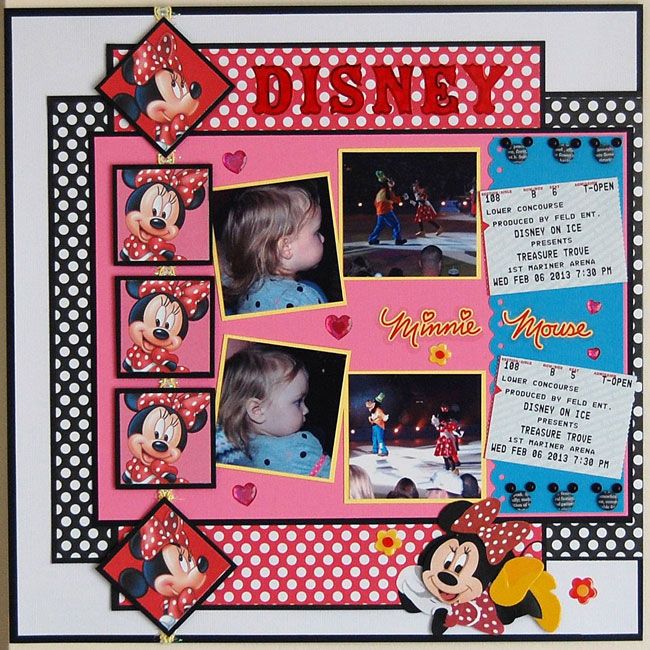
Everyone loves Mickey and Minnie Mouse! We took our grand daughter to Disney On Ice and she was completely mesmerized by the show. At 22 months of age, she didn't miss one flip, turn or jump.
The March sketch was perfect for the photos that I had. I found some cute papers and a Minnie embellishment that I wanted to use. However, I needed a few more embellishments to add to the layout. What I really wanted were some Mickey Mouse brads. I scoured the craft stores looking for some and when I couldn't find any, I decided it was time to create my own "faux" brads.
My Craftwork Cards Candi-Dots were the perfect thing for this project. These little concave paper dots come in an endless array of colors and designs. They actually look like the top of a brad.
Supplies
Craftwork Cards Candi Dots
Craftwork Cards Candi Fix
Queen&Co Nightfall Pearls
Alternate Supplies
Black Cardstock
Buttons/Black if preferred
Punches
Twine

Step 1 I chose some black newsprint dots for the head and pulled out some black pearls for the ears.

Step2 Add the Candi Fix adhesive to the back of the Candi Dot. Pop Dots or Dimensionals can be used in place of the Candi Fix.


Step 3 Position the Candi Dot on your layout.

Step 4 Add black pearls for the ears.

Step 5 If you don't have access to Candi Dots, use alternate ways to achieve similar results. Put your circle punches to work!

Step 6 Buttons are an additional item that can be used. You will need 3 buttons...1 large and 2 smaller.
Embellishments can be used in many different ways. It's not necessary to use them strictly for one purpose. Candi Dots are a versatile decoration for cards, layouts, mixed media, and altered projects. They make great flower centers and can be used in place of brads, jewels, dew drops and other non-flexible embellishments when needed. I love having them in my stash!
The March sketch was perfect for the photos that I had. I found some cute papers and a Minnie embellishment that I wanted to use. However, I needed a few more embellishments to add to the layout. What I really wanted were some Mickey Mouse brads. I scoured the craft stores looking for some and when I couldn't find any, I decided it was time to create my own "faux" brads.
My Craftwork Cards Candi-Dots were the perfect thing for this project. These little concave paper dots come in an endless array of colors and designs. They actually look like the top of a brad.
Supplies
Craftwork Cards Candi Dots
Craftwork Cards Candi Fix
Queen&Co Nightfall Pearls
Alternate Supplies
Black Cardstock
Buttons/Black if preferred
Punches
Twine

Step 1 I chose some black newsprint dots for the head and pulled out some black pearls for the ears.

Step2 Add the Candi Fix adhesive to the back of the Candi Dot. Pop Dots or Dimensionals can be used in place of the Candi Fix.


Step 3 Position the Candi Dot on your layout.

Step 4 Add black pearls for the ears.

Step 5 If you don't have access to Candi Dots, use alternate ways to achieve similar results. Put your circle punches to work!

Step 6 Buttons are an additional item that can be used. You will need 3 buttons...1 large and 2 smaller.
Embellishments can be used in many different ways. It's not necessary to use them strictly for one purpose. Candi Dots are a versatile decoration for cards, layouts, mixed media, and altered projects. They make great flower centers and can be used in place of brads, jewels, dew drops and other non-flexible embellishments when needed. I love having them in my stash!


5 comments:
Great idea Vicki!
Awesome tutorial and love the page!
fabulous page and great tutorial.. you rocked this Vicki
What a wonderful tutorial, Vicki! Will be remembering this for my Disney album!
Fun page, and great (and frugal) ideas for creating one's own Disney embellishments. TFS!
Post a Comment