Ann Jobes here to welcome you to another tutorial from the My Sketch World design team. I created this layout for the May 1st layout sketch:
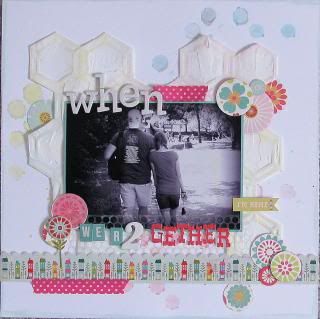

In this tutorial, I am going to show you how I created that tinted textured background with the hexagons.
You will need:
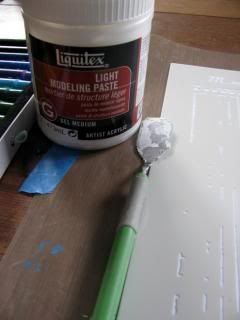
- A background stencil (lots of things work as stencils besides store bought templates, such as the bags produce is sold in, a leftover sheet where you've used all the chipboard or diecut pieces, something you created on a diecut machine, or the piece left when you use your punches, etc.)
- Modelling paste (this one is light paste - the difference between this paste and the heavy paste is like the difference between whipped butter and a block of butter; this goes on very smoothly and dries quite quickly without being heavy)
- something to spread with (this can be a hotel key, old credit or gift card, a spatula or putty knife, even a plastic knife from a take-out meal)
- gelatos or watercolour crayons
- sheet of cardstock, at least 80 lb (I like the white on white effect, but you could use a coloured piece)
1. Adhere your template to the cardstock using painter's tape or washi tape to prevent the template from moving.
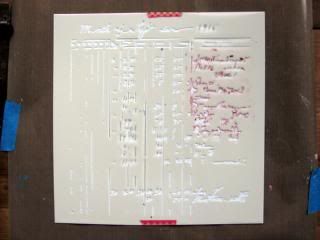
2. Using your tool of choice, spread or scrape the modelling paste over the template, ensuring it is spread evenly. (You can see that I used this template on a previous project. If you are working with mists or watercolour paints with your templates, it's a good idea to clean them in between, because these are water activated and can taint your next project - if you're adventurous, ignore all that! In this case, I had used acrylic paint, and it's fixed there, so I don't worry about red paint contamination on the white modelling paste.)
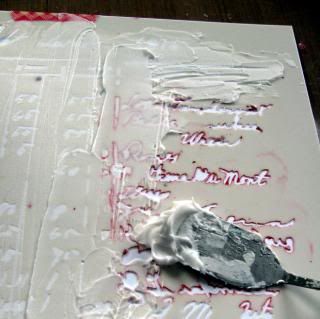
3. Once you've filled in as much of the template as you'd like (remember you can do the whole template, or just part(s) - depending on your project), gently peel off the tape and carefully lift away the template. When I'm working with pastes, I wash the stencil right away, especially stencils with small cutouts, so they can't be ruined with dried up product.
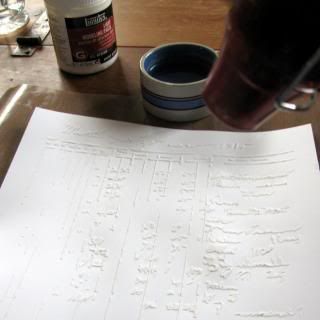
4. Allow your page to dry. Work on another part of the layout for awhile. If you are in a rush, you can put the heat tool on it, but be warned! If you get too close you can cause the paste to bubble, an effect you might not want (I like it on clouds), and if you aren't moving the heat tool around at a distance, you can scorch the paste and turn it brown. I tend to apply the heat from the bottom side of the paper, and then just give it a last bit of heat from the top to finish it off. Wasn't that fun? You've created a unique raised effect on your background!
5. Now it's time to jazz it up a little! You could just mist over it, or splatter some paint, but I'm going to show you how I tinted the hexagons using gelatos. Gelatos are a watercolour product, packaged in a tube that rolls up like lipstick. They are soft and creamy when applied dry and they can be layered. They are also water activated, and you can create dreamy watercoloury effects using them. For this piece, I got right in there with my fingers. I simply dipped a finger in a nearby dish of water and dabbed my finger on the end of the gelato to pick up some colour and then dabbed the colour onto the raised image created with the paste.
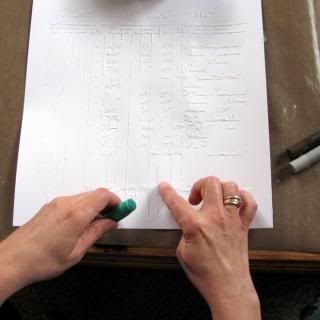
6. Feel free to layer on more colour using the same method. I layered a teal first, followed by brown.
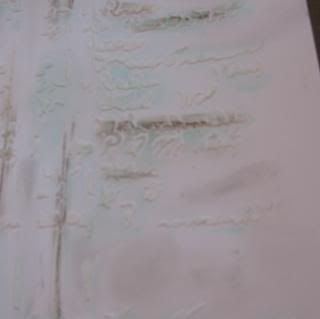
7. I'm picturing this being the base for either a masculine page or a page with a vintage photo. Can you see some gray in the spaces between the paste? I applied the gray using the same technique, but not on the raise spaces but on the plain spaces instead. I didn't prep the page with gesso first, so the gelato doesn't move on the paper well. I'm fine with that for this page. I just wanted you to know that it will behave differently on plain cardstock versus pre-gesso'd cardstock.

This is the finished technique, and the page is ready for more treatments, layers and photos!
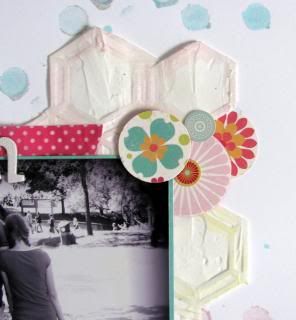
For the hexagon background on the layout created with the May 1st sketch, I fussy cut that cluster of hexagons so that the page is no longer a square, but a funky shape ready for more layering.