Welcome to My Sketch World

Showing posts with label Tutorials. Show all posts

Wednesday, July 17, 2013

{Tutorial} Create Your Own Challenge Book

I have a confession --

I am a list maker - I make lists of my lists. And each to do on my list has a list. I love lists!

In my scrapping life I make challenge books to satisfy that list making urge. I have my challenge blogs that I frequent, the boards I visit and the manufacturer challenges all in one tidy book. I cut and paste each sketch and color swatch, write down every instruction for each challenge and every blog hop that I participate into this book. I have been doing this for several years and have four such notebooks to look back in for sketches, color ideas and challenge inspiration for my scrapbooking. 

I wanted to share some tips and tricks on how to make your own challenge book. It truly is an invaluable tool to have on hand!

How To Attach
I cut out each sketch and color swatch after editing it (see below) and tape it in my book. Staples are lumpy, bumpy, and tear easily. So get yourself some Scotch tape!

The Notebook
I use a 5-1/2" x 8-1/2" notebook with a plastic cover or a chipboard type cover. I choose these because the first notebook I used has lost its paper cover bit by bit and is not very sturdy! I am not endorsing the Martha Stewart products at Staples office supply stores but I must tell you that I love them! Sturdy plastic cover, double ring binding, and a pocket page inside - they are wonderful! When there is a sale I stock up!


To set up your challenge book - you must get organized to be organized! 
Which challenge blogs do you visit, what manufacturers have a challenge on the blogs, what boards do participate in. Make a list of the sites and the date(s) that they post their challenges and the date(s) the challenges are due (if they are always the same) in the front of your book. 
I divide up my book by month. At the beginning of the month I make a page (or half a page if there is only one challenge a month) for the site and as the challenges are posted I will put them on the appropriate page. When I am done with that month I paper clip all those pages to the front cover so as not confuse myself!Here is an example from the challenges posted here at My Sketch World board.


Different types of Challenges - how I place them in my book

Sketches - Copy, Paste and Resize
- Right click on sketch and select copy
- Paste onto a word document
- Right click on object and select Format Object from menu
- Click on the Size tab 
Your goal is to change the layout’s size to a 2.33” X 2.33” square or a 2.17” X 2.17” square. These sizes fit well in the book, don’t take up the entire page, and still allows for details to be seen. It also allows for the most important part - planning ahead! If the message board or blog posts a sketch every week you know how much space those sketches will take up in the book (which is eight lines of the notebook paper) and can plan on devoting a whole page, half a page, or two pages.
For example when copying Lucy’s sketches from the MSW blog onto a word document the measurements are generally 4.33” X 4.33” so I would only have to subtract two inches from the height and width and type in the new dimensions. On some others the sketches are not as uniform in size and might require more math! Another example would be a sketch that measures 5.78" X 5.21". 
- I subtract 2.33 from 5.21= 2.88
- I type 2.33” in the width box.
- For the height box I would subtract 2.88 from 5.78 and get 2.9. 
- So my height box is 2.9” and my width box is 2.33”.
- This keeps everything in proportion and doesn’t distort it!
This seems complicated and you might want to just want to eyeball it! But I prefer to plan my notebook pages in advance!
For two page sketches - they are generally small on the screen to begin with so they can be copied and pasted with out altering too much. But it depends on the sketch site as well. 
Here is an example from my challenge book -

 
Color Swatches - 
On color story swatches there is usually a picture and then the specific colors they would like for you to use. I only keep the specific colors to save on space, computer ink, and space (did I already mention that?)
My example is from The Playdate CafĂ©. 
- Right click on color swatch and select copy
- Paste onto a word document
- It will look like this:


- Click and drag small square on side of picture (not corners) while holding the control key to crop out picture. It leaves you with a color swatch only to place in your book. This is what it will look like when you crop out the picture.


Challenges not mentioned above - 
Often with challenges on blogs or on boards I can just write down what the requirements of the challenge are! See the first page above - I just wrote what each challenge was from the designers. 

When I finish a challenge I post it to where it is required - my blog or the gallery of the message board and I highlight it! When it is highlighted I write down when the winner will be announced so I can make sure to look if I did win!

I hope that you make yourself a challenge book! It is so wonderful to have and to look back on the sketches, challenges and color swatches to inspire you when your mojo is taking a vacation and you are not!


By Kristin Perez

Tuesday, June 18, 2013

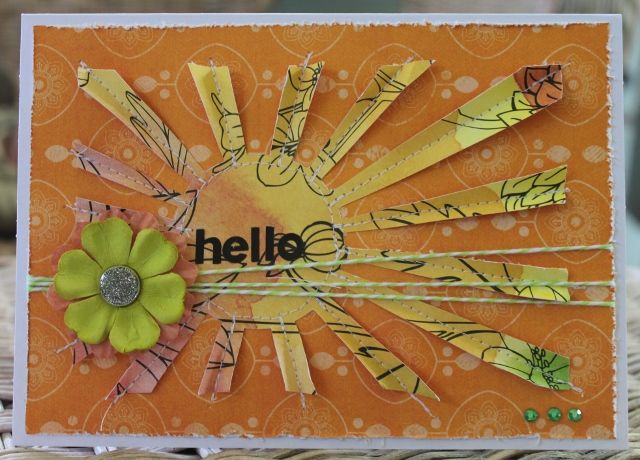
{Tutorial} Create a sunburst from patterned paper

I love the sun and with all the rain we have had this spring, I had to make my own sunshine, lol! I am going to show you how to create a sunburst from patterned paper.

Supplies needed:
Card base
Patterned paper/ cardstock
Cutting mat
Ruler
Pencil
Something round to trace a circle
Exacto knive/trimmer/scissors
Optional- sewing machine/ needle & floss

Step 1:
My card has a 5x7" base. Cut a piece of patterned paper or cardstock 5 1/2"x3 3/4". 
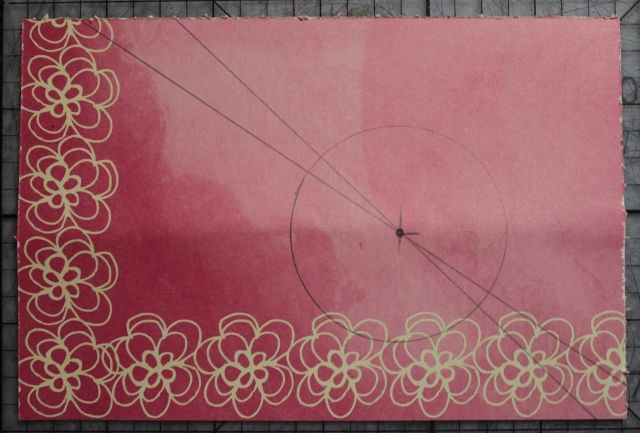
Trace a circle on the backside of your patterned paper or cardstock. I put mine off center. Find the center of your circle and make a dot:

Image

Step 2:
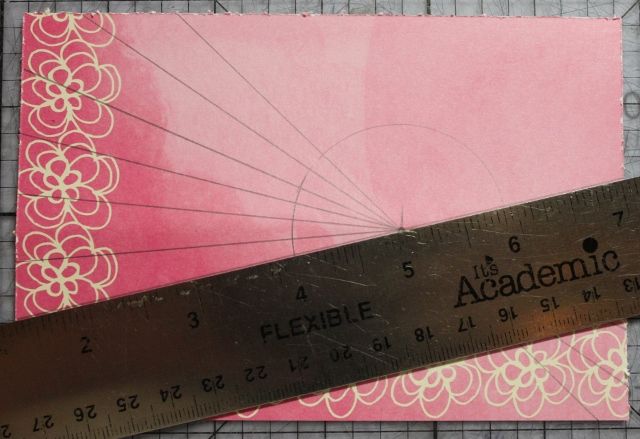
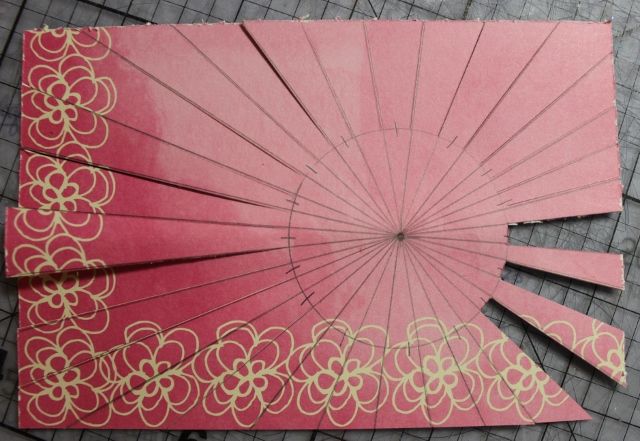
Start making your lines for your rays using a ruler and a pencil, go from one side of the paper at an angle to the other.

Image

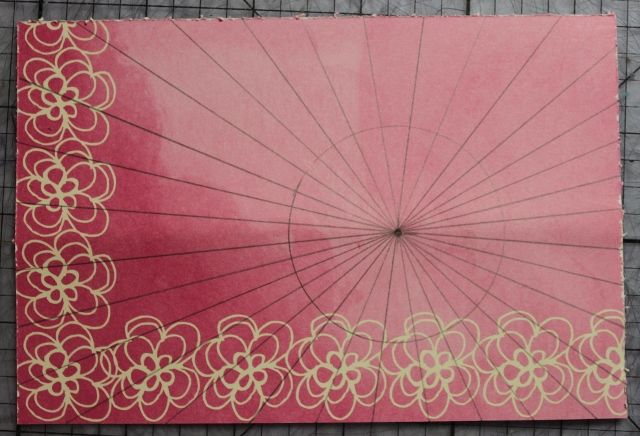
This is what it should look like when you are finished:

Image

Step 3:
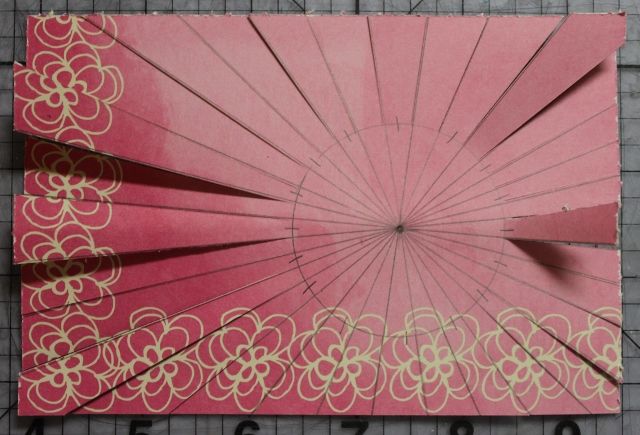
Next, I mark with pencil the rays I will be cutting. I try to leave the corner ones in tact if possible. Also by marking them, you will be sure you have the right amount of rays and won't have 2 cut out together. Using my Exacto knife, cutting mat and ruler, I cut on every line only from the circle outward:

Image

Step 4:
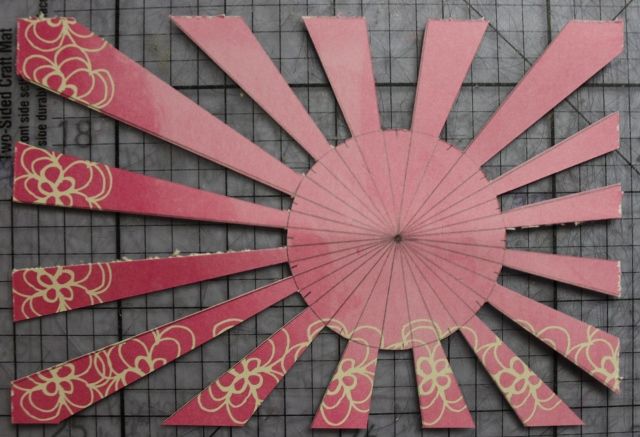
On the rays you added the mark to (this should be every other one), trim along the circle with your scissors or Exacto knife to cut that ray off:

Image

This is what it will look like when you are done:

Image

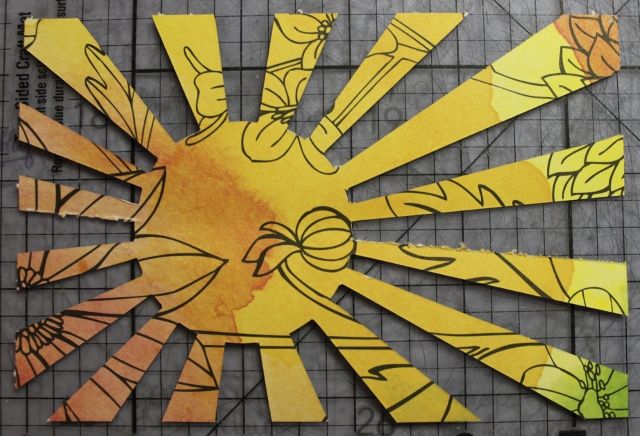
Here is the front side:

Image

Step 5:
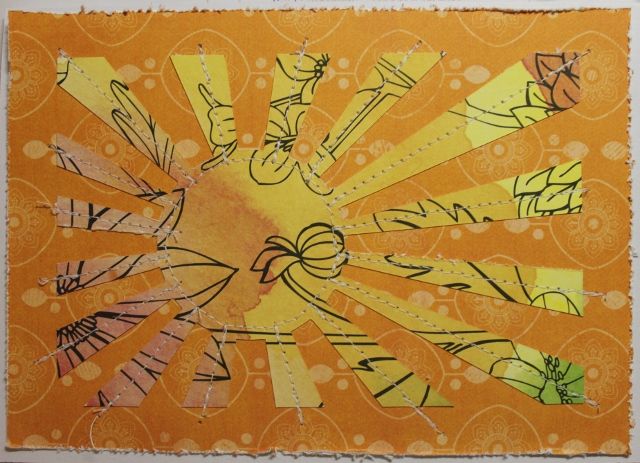
Adhere the sunburst to your base or front panel of your card, I stitched mine, I think it gives it more texture:

Image

Step 6:
Now you are ready to embellish and add your sentiment.

I used Lucy's June card sketch for my card.
Here is my completed card:

Image

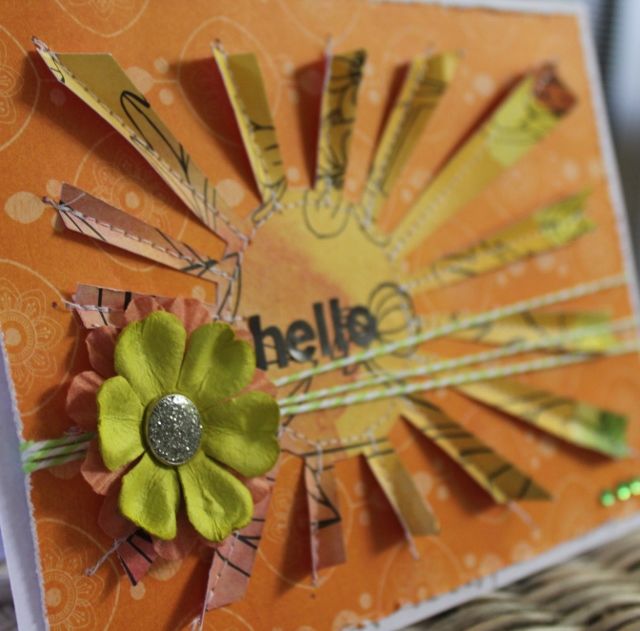
and a close up:

Image

I would love to see your card or layout you make using this tutorial!

Friday, May 10, 2013

{Tutorial} Tinted Textured Background


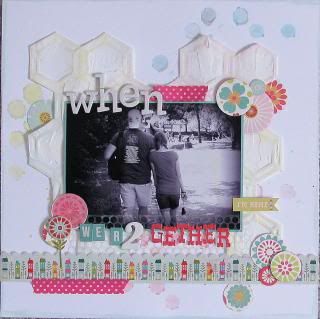
Ann Jobes here to welcome you to another tutorial from the My Sketch World design team. I created this layout for the May 1st layout sketch:
Image


In this tutorial, I am going to show you how I created that tinted textured background with the hexagons. 

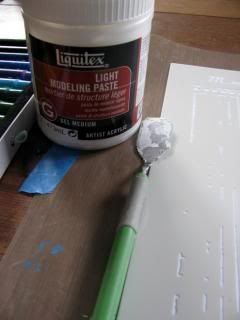
You will need:
Image

- A background stencil (lots of things work as stencils besides store bought templates, such as the bags produce is sold in, a leftover sheet where you've used all the chipboard or diecut pieces, something you created on a diecut machine, or the piece left when you use your punches, etc.)
- Modelling paste (this one is light paste - the difference between this paste and the heavy paste is like the difference between whipped butter and a block of butter; this goes on very smoothly and dries quite quickly without being heavy)
- something to spread with (this can be a hotel key, old credit or gift card, a spatula or putty knife, even a plastic knife from a take-out meal)
- gelatos or watercolour crayons
- sheet of cardstock, at least 80 lb (I like the white on white effect, but you could use a coloured piece)

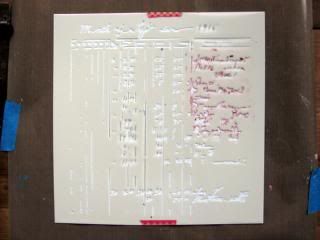
1. Adhere your template to the cardstock using painter's tape or washi tape to prevent the template from moving. 
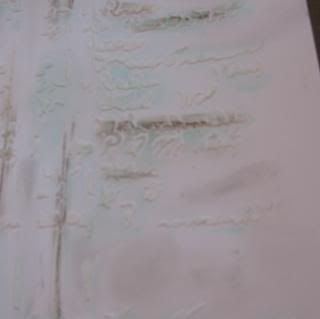
Image

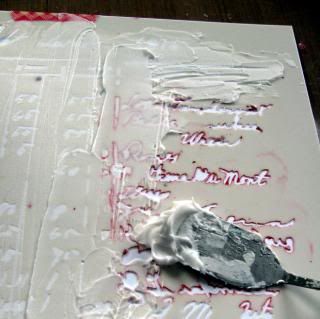
2. Using your tool of choice, spread or scrape the modelling paste over the template, ensuring it is spread evenly. (You can see that I used this template on a previous project. If you are working with mists or watercolour paints with your templates, it's a good idea to clean them in between, because these are water activated and can taint your next project - if you're adventurous, ignore all that! In this case, I had used acrylic paint, and it's fixed there, so I don't worry about red paint contamination on the white modelling paste.) 
Image
3. Once you've filled in as much of the template as you'd like (remember you can do the whole template, or just part(s) - depending on your project), gently peel off the tape and carefully lift away the template. When I'm working with pastes, I wash the stencil right away, especially stencils with small cutouts, so they can't be ruined with dried up product. 
Image
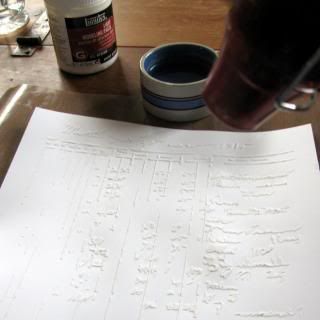
4. Allow your page to dry. Work on another part of the layout for awhile. If you are in a rush, you can put the heat tool on it, but be warned! If you get too close you can cause the paste to bubble, an effect you might not want (I like it on clouds), and if you aren't moving the heat tool around at a distance, you can scorch the paste and turn it brown. I tend to apply the heat from the bottom side of the paper, and then just give it a last bit of heat from the top to finish it off. Wasn't that fun? You've created a unique raised effect on your background!
Image
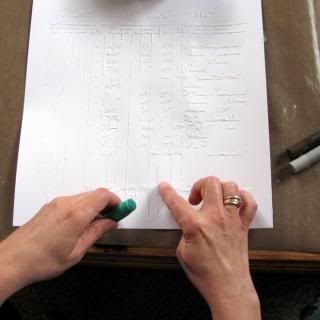
5. Now it's time to jazz it up a little! You could just mist over it, or splatter some paint, but I'm going to show you how I tinted the hexagons using gelatos. Gelatos are a watercolour product, packaged in a tube that rolls up like lipstick. They are soft and creamy when applied dry and they can be layered. They are also water activated, and you can create dreamy watercoloury effects using them. For this piece, I got right in there with my fingers. I simply dipped a finger in a nearby dish of water and dabbed my finger on the end of the gelato to pick up some colour and then dabbed the colour onto the raised image created with the paste.
Image
6. Feel free to layer on more colour using the same method. I layered a teal first, followed by brown. 
Image
7. I'm picturing this being the base for either a masculine page or a page with a vintage photo. Can you see some gray in the spaces between the paste? I applied the gray using the same technique, but not on the raise spaces but on the plain spaces instead. I didn't prep the page with gesso first, so the gelato doesn't move on the paper well. I'm fine with that for this page. I just wanted you to know that it will behave differently on plain cardstock versus pre-gesso'd cardstock. 
Image

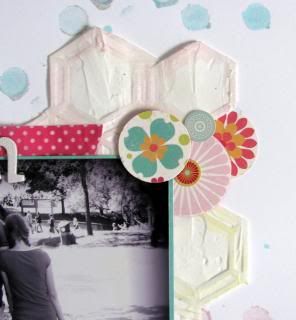
This is the finished technique, and the page is ready for more treatments, layers and photos!

For the hexagon background on the layout created with the May 1st sketch, I fussy cut that cluster of hexagons so that the page is no longer a square, but a funky shape ready for more layering.
Image

Saturday, April 27, 2013

A Different Take on April's Card Sketch - Inspiration & Tutorial


Greetings My Sketch World Fans! As April winds down and you await May's sketches I thought I'd share a way for you to take one last go with April's card sketch before you tuck it away.

Card Design Inspiration

When I start looking at a sketch my mind wanders with all the possibilities - will I rotate it, create a scene, keep it as is, only select aspects of it, etc.  And of course there will be mixed media play involved.

Here I've embossed the top half of the card with a stencil, outlined some of the clouds roughly with a gel pen, and added some glitter glue sparsely with my finger for additional texture and sparkle.
For this card I started with the sketch as it was.  You can see I have the base layer pretty much the same as it in the sketch.  I created layers to my liking and added my mixed media additions (tutorial following for top layer).  From here I changed it up a bit though.

I rotated the card sketch to look like the above photo because I had a vision in my head of a plane pulling banners behind going across the cloud top layer I created.  So I headed to my stash of stamps in search of a plane stamp.

Wire replaced the banners here and a few sequins, along with a stamped sentiment and doodling around the edges finished off my design
I had no luck in finding a plane stamp, but it actually worked out well.  The bottom paper says "love you to the stars and back" so a spaceship works out better anyways, right? I think so.  Now the placement and design doesn't hold true to the sketch, but its okay.  This is the wonderful thing about  sketches - they are meant to be springboards.  You can use them wholly or just take parts for your design as I did.  This card would never have come to exist if wasn't for Lucy's fabulous sketch.  I took portions of it and then made it my own as well.  I encourage you to be inspired and try the same!

Now for some more inspiration: a tutorial on how to emboss with your stencils!

Embossing with Stencils


In order to save this post from getting so lengthy, I created a collage of photos,  we'll move from top left and work clockwise with the tutorial. Its fairly simple and please feel free to leave me questions in the comments or contact me on the forum.

Step One:  Grab your chosen 6x6 or smaller stencil (yes this will only work for small size stencils) and set it up for embossing.  You will need to place your paper with the pattern you want to have embossed down.  Does that make sense?  Whatever side you want puffed up has to be touching the stencil in other words. If your using a Cuttlebug you will use an A, B, C plate set up for this.

Step Two: Place the C plate over the top and run your sandwich through your embossing machine.

Step Three:  When you remove the sandwich from the machine, peel your stencil gently away from your paper - yes they may be slightly stuck together.  

Step Four: Sit back and marvel at the beauty of an embossed stenciled piece of paper! :D

Here is what the cloud piece of paper looked like before I placed it on the card:


Same technique as above - different stencil.  

I do hope you have enjoyed today's inspiration and tutorial.  If you try out this technique be sure to pop on by this blog or my personal blog and let me know - I'd love to see your work and be sure to upload it in the My Sketch World gallery.

Take good care!


Friday, April 19, 2013

{Tutorial} Home Decor Project

Home Decor Project by Marion A. Wybranietz

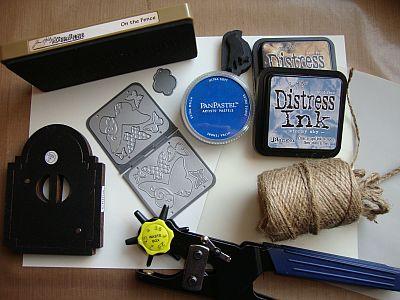
This is what I need for my creation:

Image
Cardstock (Not to light!), Vellum, punch, dies, cord, pan pastel, distress ink, 
water spritzer

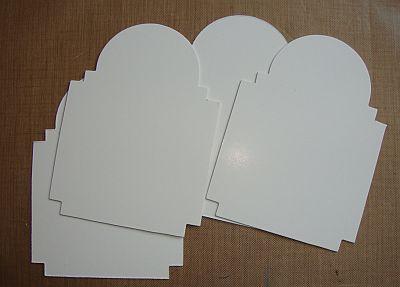
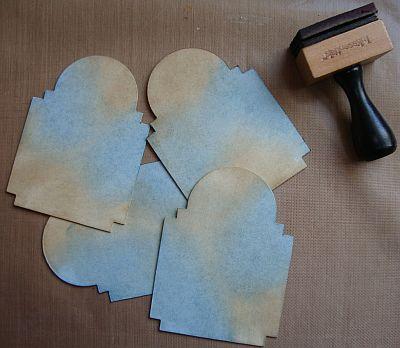
I cut four templates with a Sizzix die; you can cut any shape, such as a rectangle, 
an arch, just anything!

Image

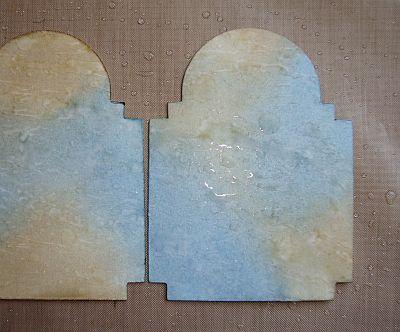
I applied distress ink .....

Image

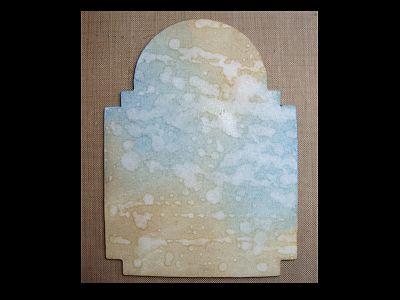
.... and “spritzed and flicked” it with water …..

Image

….. all dried up now!

Image

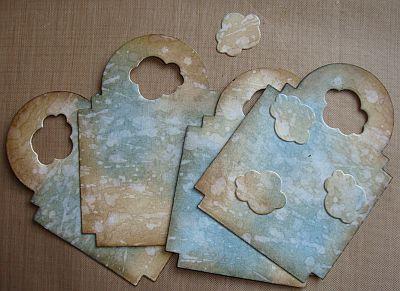
I cut some “holes” into the top, you can use any die or punch, such as flowers, 
snowflakes, circles etc. 

Image

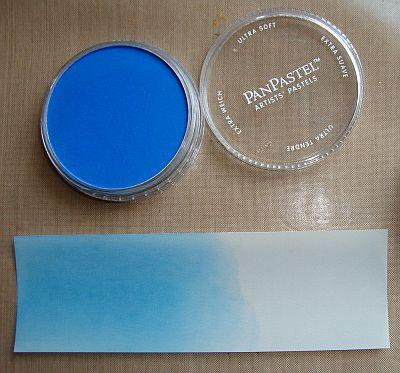
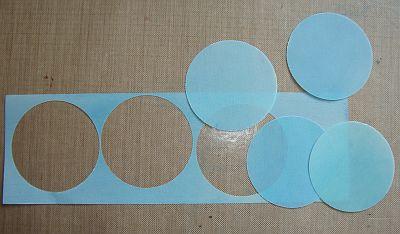
I applied Pan Pastel to the vellum …..

Image

….. punched circles …..

Image

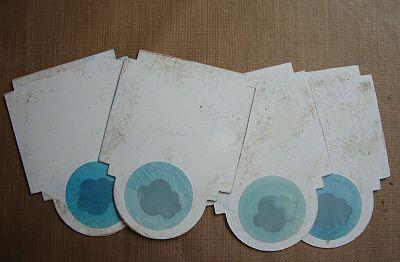
….. and glued them to the back of the template.

Image

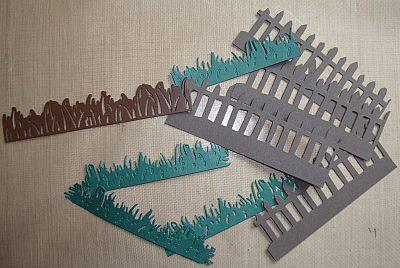
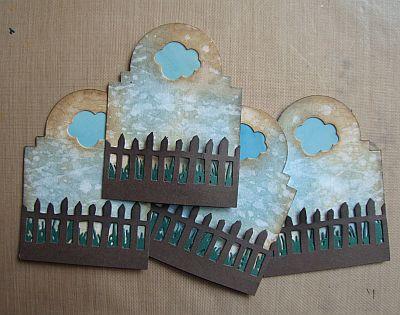
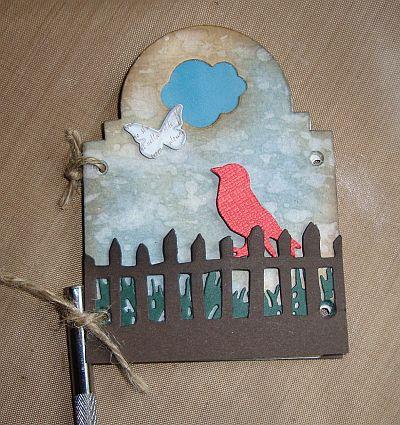
Now it’s time for the decoration. I cut a fence and as and afterthought also 
some grass,

Image

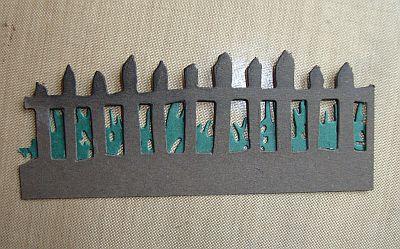
which I glued together …..

Image

….. and adhered to the template, creating a little “belly”!

Image

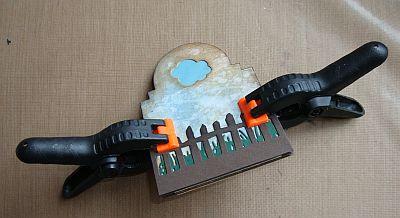
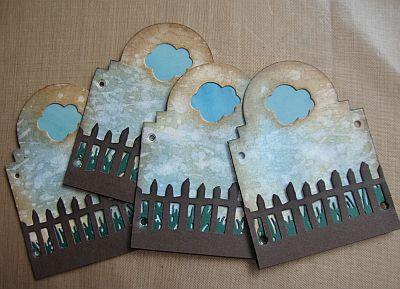
I fixed all four templates with a tool (clamp) and punched the holes. 
This way they will all be on the right position!

Image

Done ;)

Image

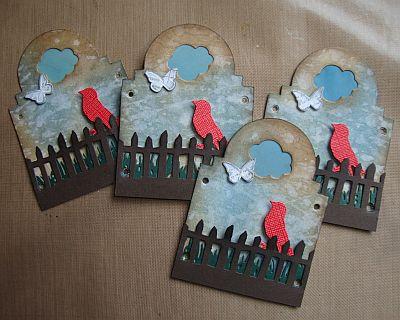
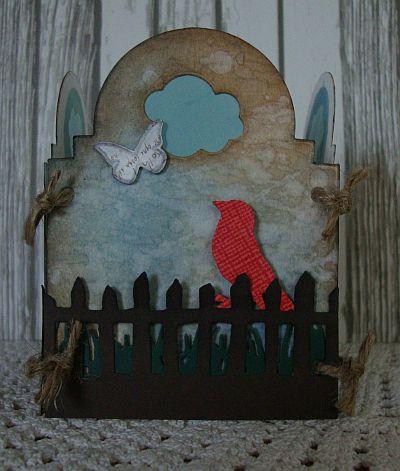
I added the birds and the butterflies (also an afterthought) …. 

Image

….. and tied all templates together with a cord. I always use a pen or something 
similar in between, this way my “hinges” can still move and I don’t ruin the sides 
of my templates!

Image

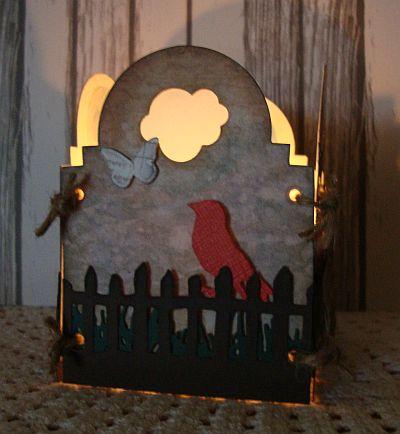
A little present for a loved one, a little take along for a friend, or just put it on 
the mantel or on the terrace in Summer, that`s where I keep mine ;)

Image

Can’t wait for night to come ……

Image

Thanks so much for following me through the journey of 18 pictures. I am still 
a beginner with tutorials!